Time Schedules
|
CBMS supports BACnet Time Schedules in the following products.
|
|
BACnet Timeschedules require the clock to be configured to use the correct Time Zone, on all products except Windows. To configure the time zone navigate to app-service-date to display the DateService. From this screen, change the timezone to suit your location and check to ensure that the correct time is set.
|

|
|
Navigate to app-drivers-bacnet-local and verify that the IP port is enabled and running. Navigate to app-drivers-bacnet-local and verify that the BACnet Device settings are correct, the DeviceId must be changed from the default value of 9999 to a unique number.
Select "Add Points" from this page if the settings look correct. |

|
|
From the ObjectType list, change the type to Schedule and change the starting instance and quantity to the desired values.
Click the add button to populate the list of schedules to be added to the device. Once you have finished adding schedules to the list, click the next button and the schedules will be saved to the device. |

|
|
Navigate to app-drivers-local-points-schedule-schedule 1 where you can view the weekly schedule. New weekly schedules can be added from this page by clicking on the grid. In the screenshot to the right a switch time has been added to Sunday which will activate the schedule during those times.
|

|
|
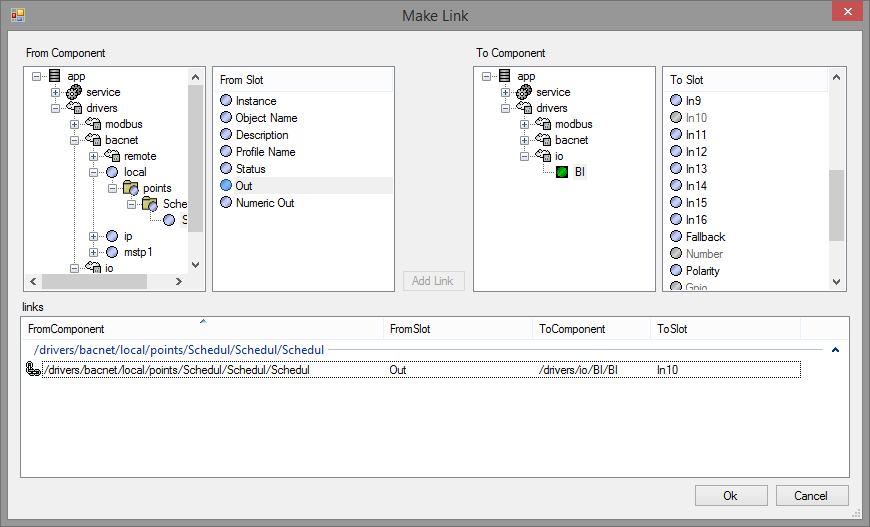
The present value of the Time Schedule is an output which can be wired into a component as an input. For example, we have created a Binary Output on the Raspberry PI linked to GPIO pin 4. To activate the GPIO pin from the timeschedule, navigate to the wiresheet that contains to component you want to link to and then click the "Make Link" tool bar icon.
This will display the Make Link dialog box from which wil can wire the Out slot from the Time Schedule to one of the In slots on the Output. |
|
|
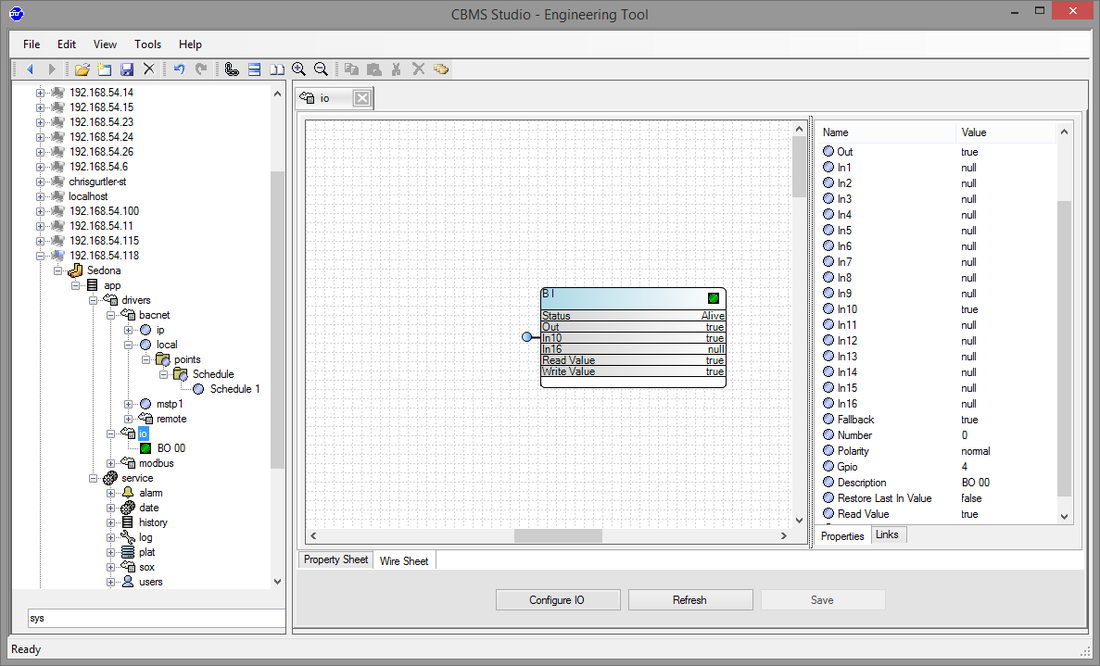
After adding the link a circle will be displayed to the slot to indicate that the link is connected to a component on another wiresheet. In this case it is In10 which is connected to the timeschedule out slot and because the timeschedule is active, the Binary Output is active which turns the GPIO on.
|
|
